Mark and I have been married for 10 years now and although we've always had some sort of home improvement project going on at all times, our master bedroom has always gotten the shaft. We never take the time to work on our space. By golly, it was time!
I've had these lamps for probably 5 years, and I've never really liked them much. The only thing in their favor was the fact that I had two *matching lamps*. With my propensity for thrifting, having a pair of anything is extremely uncommon in this house.
I gave the bases a black satin spray paint finish and used some fabric that I had on hand (thrift store, 1 1/2 yards, $1.50) and gave them a little botox injection.
Again...these pictures are awful, but you get the idea.
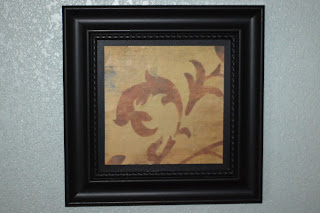
Last week my neighbor passed me quite a few decor pieces that she was getting rid. In the pile of stuff, were these two eye sores. I gave the frames and the canvas a coat of Ralph Lauren Satin black paint and used then stuck on a removable decorative vinyl square that I bought half price at Kohl's after Christmas. 9 squares cost me $12...you'll see the others later.
Before
(I had already started painting the one on the left when I realized that I forgot to take pics)
After
(you'll see the other one later)
And my most exciting change for the room, the headboard! Mark and I have not had a headboard our entire married life, so when I did the bathroom makeover and had the two left over cabinet doors my wheels started turning. It just so happens that height of the two cabinet doors combined was two inches more than the width of our bed. Coincidence? No! It was fate!
I used the same Behr Cottage White Semi Gloss paint that we used in the bathroom makeover and bought two wood embossed-like appliques from Hobby Lobby ($2.99 each) and painted them with the satin black latex paint. I attached them with liquid nails and voila! I have a homemade headboard!!!
Next, I took some framed prints I already had, removed the pictures, covered the cardboard backing with some nice flocked material that I had on hand from a Goodwill find. I decided to leave the glass off for a softer look.
Before
After
The frame in the middle of the wall was an old canvas painting that I wasn't too fond of. It had a silvery frame that I painted with the satin black latex and then I just painted over the canvas (which was previously a floral) with the same color as the wall paint and then I used more of the removable vinyl clings.
I'm still not done with the bedroom yet, but round one is complete! The walls are Behr Premium Plus in Verdigris, which is Behr's newest paint line. It's a primer and paint in one.
So here's the crappy before picture that I almost forgot to take...notice everything has already been moved. (another note to self: make sure to check your pics to make sure they came out ok...and make sure auto focus is on!):
After:


It looks lovely. I just did our bedroom also after not having done anything for 10 years.
ReplyDeleteLove it...what a great way to use a frame and "re-vamp" the picture!
ReplyDeleteWow! It looks great! And I'm wild about your headboard. Love it!
ReplyDeleteGorgeous! I love the wall color and the headboard looks amazing.
ReplyDelete